Create Objects: Difference between revisions
No edit summary |
|||
| (One intermediate revision by the same user not shown) | |||
| Line 284: | Line 284: | ||
::'''Exit Velocity''': Exit Speed; When object is teleported, additional velocity will be added towards the direction of the exit point. | ::'''Exit Velocity''': Exit Speed; When object is teleported, additional velocity will be added towards the direction of the exit point. | ||
::'''Reset Exit Rotation''': When object is teleported, make the object face the direction of the exit point. If false, they will have their original world rotation | ::'''Reset Exit Rotation''': When object is teleported, make the object face the direction of the exit point. If false, they will have their original world rotation | ||
::'''PS''': The '''Destination''' can't below the "ground", it will make players dead after finish teleport. | |||
:'''Teleport Volume''': A trigger to Teleport an object to another position. | :'''Teleport Volume''': A trigger to Teleport an object to another position. | ||
| Line 292: | Line 293: | ||
:[[File:Teleport6.png|border|633x633px]] | :[[File:Teleport6.png|border|633x633px]] | ||
::Player can use these objects to make a teleport. | ::Player can use these objects to make a teleport. | ||
:'''PS''': | |||
:Multiple Teleport Destinations can be set with the same target name. After transmission, one of these Teleport Destinations will be randomly selected as the destination when a Teleport Volume uses this target name as the destination. | |||
:A Teleport Destination can be set as the destination by multiple Teleport Volumes, and these Teleport Volumes can be transmitted to the same destination. | |||
: | |||
=== '''Demo Videos''' === | === '''Demo Videos''' === | ||
Latest revision as of 19:32, 8 September 2023
This chapter will introduce various objects used to create scenes in GamingGrid.
Primitives[edit | edit source]
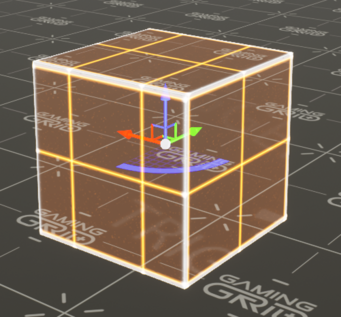
There are 6 kinds of primitives available in GamingGrid(Cone/Cube/Cylinder/Plane/Sphere/Wedge).
Error creating thumbnail: Unable to save thumbnail to destination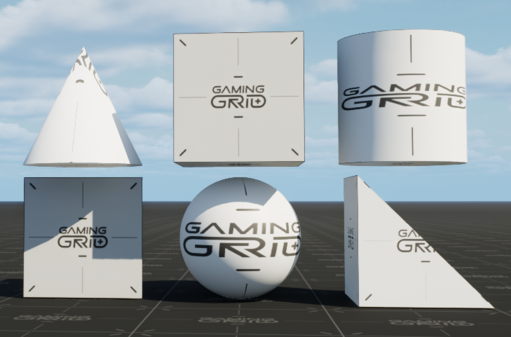
Mesh Pivot[edit | edit source]
- Desired Pivot
- Error creating thumbnail: Unable to save thumbnail to destinationError creating thumbnail: Unable to save thumbnail to destinationError creating thumbnail: Unable to save thumbnail to destination
- Set where the Pivot indicator appears: center/corner/bottom
Material[edit | edit source]
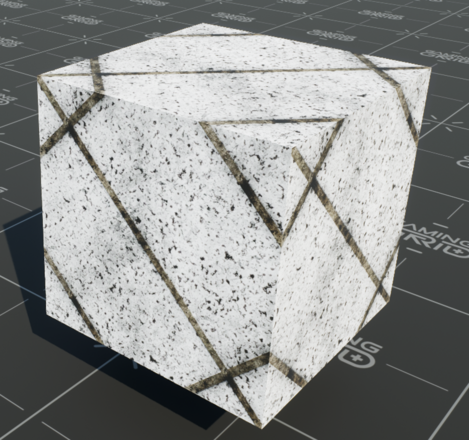
- choose a material texture for the primitive.
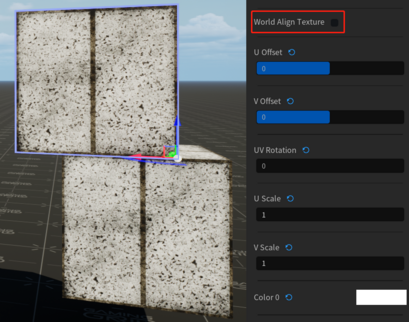
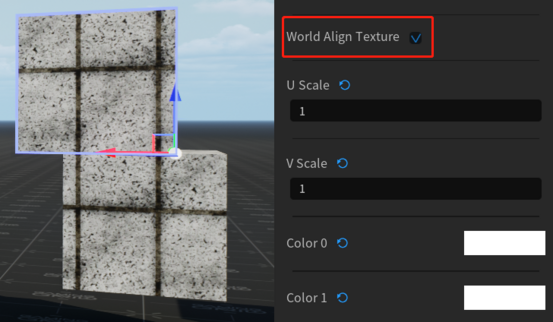
World Align Texture: Use World-Aligned Texture Coordinates, Or Not.
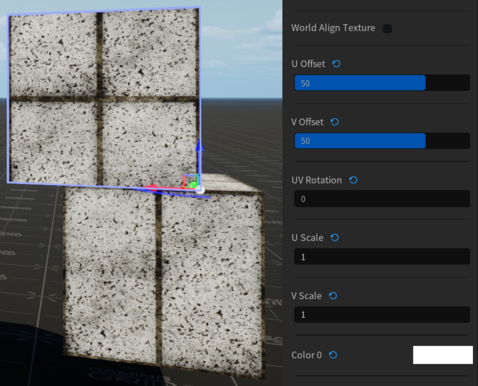
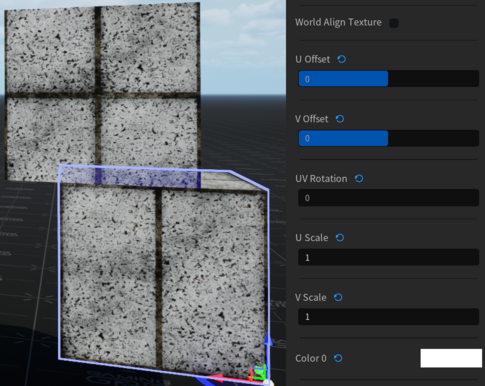
U Offset & V Offset: Texcoord Offset(Horizontal & Vertical), but not available for World Align Texture.
UV Rotation: Rotate The Texture.
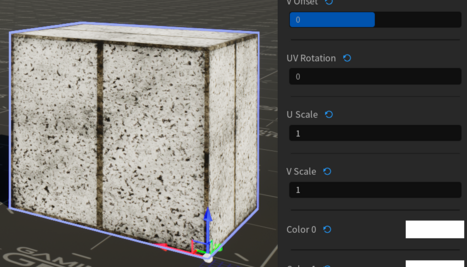
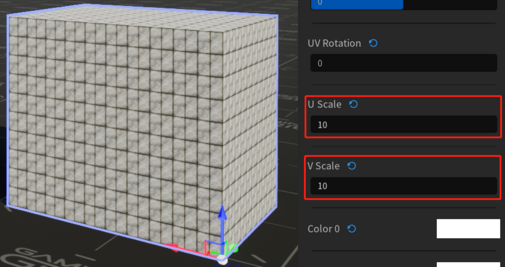
U Scale & V Scale: Texcoord Scale(Horizontal & Vertical)
Color 0: Multiply the base texture color. For the Neon material, this is the Neon Color.
Color 1: If material supports emission, this is the emission color multiplier(Not used by Neon Material).
Illusionary[edit | edit source]
- Illusionary(Non-Solid)has no Collisions whatsoever.
Movement Func[edit | edit source]
- Simulate Primitive with movement(Rotating/Platform/Train)
- Rotating:
- Spawnflags:
-
- Start On: Start rotating immediately.
- Rotate Backward: Rotate in the opposite direction by default.
- Rotation: X/Y/Z-Axis: Rotate around the X(Red)/Y(Green)/Z(Blue)Axis(Default).
- Accel/Decel: Accelerate/Decelerate to max speed when Toggled, otherwise change speed immediately.
- Max Rotation Speed: The maximum rotation speed, in degrees per second.
- Rotational Friction: The amount of rotational friction. Value must be between 0 and 100%.
- Blocked Damage: Damage per second to inflict to anything that is blocking movement.
- Blocked Damage Type: Damage Type to use for Blocking Damage(Generic/Crush/Slash).
- Outputs:
- OnGetSpeed: Fired when the GetSpeed input is called. The current speed is passed with this output.
- OnStarted: Fired when rotation is started.
- OnStopped: Fired when rotation is stopped.
- Platform:
- Platform Height: Height that the platform moves.
- Start At Top: Start with platform up to top height at begin play, instead of starting location.
- Top Yaw Rotation: Final Yaw rotation of the platform at the top. The rotation is relative to the initial rotation,
- e.g. 180 would mean when it reaches the top the platform is rotated 180 degrees from it's starting rotation.
- Manual Input: Platform can only be moved by input'ManualMove'.
- Platform Movement Speed: Speed that the platform moves.
- Auto-Move: Start moving automatically, oscillating between top and bottom.
- Auto-Move Delay: When reaching top/bottom, wait this many seconds before moving again.
- Blocked Damage: Damage per second to inflict to anything that is blocking movement.
- Blocked Damage Type: Damage Type to use for Blocking Damage(Generic/Crush/Slash).
- Outputs:
- OnStartMove: Fired when Platform starts moving.
- OnStopMove: Fired when Platform stops moving.
- OnReachedTop: Fired when Platform reaches the top.
- OnReachedBottom: Fired when Platform reaches the bottom.
- OnBlocked: Fired when Platform is blocked for movement.
Fracturable[edit | edit source]
- Can this object be fractured.
- Objects will always be broken in it's Y-axis direction. The Scale in the Y-axis should less than 10.
- When an object break, it would remains on other objects it is connected to.
- Max Durability: Damage required until glass cracks/non-glass breaks apart.
- Should Respawn: Should this fracturable respawn.
- Respawn Time: Time before the fracturable will respawn.
- Fracture Flags: Reset to default value.
- Input-Only: Ignores all damage/impact, only breaks via the break input.
- Break on Touch: Break only when a player or npc touches.
- Break on Physics, immediately: Break when any simulated physical object touches, immediately.
- Ignore damage/impact: Ignore damage, use in conjunction with Break on touch/physics flags.
Surface Override[edit | edit source]
- Override the physical surface, instead of using the actual material type. It will make them Audio different.
Demo Videos[edit | edit source]
Interaction[edit | edit source]
I/O[edit | edit source]
Error creating thumbnail: Unable to save thumbnail to destination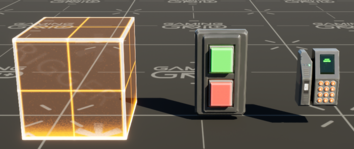
These objects can be triggered to fire outputs for other objects such as: doors, special effects, logic, etc.
- Area Trigger
- A type of collision box that outputs when a character makes contact with or leaves it.
- Target Name:
- Target Name for I/O scripting to fire inputs.
-
- Volume Flags:
- Trigger Once: Only fire once, and then destroy.
- On Enter Only: Only fires "OnTriggerEnter" Output.
- On Exit Only: Only fires "OnTriggerExit" Output.
- Item: Don't Consume: If an item is required to activate, don't consume the item.
- Start Disabled: Requires 'Input Enable' to be used to enable the volume.
- Required Item: Items that need to be consumed when triggered.
-
- Outputs:
- OnTriggerEnter: This Output fires when characters makes contact the Area Trigger.
- OnTriggerExit: This Output fires when characters leaves the Area Trigger.
-
- e.g.
- trigger a door open/close.
- Error creating thumbnail: Unable to save thumbnail to destination
- place an Asset of door, and edit the Target Name.
- place an Area Trigger as it's collision box.
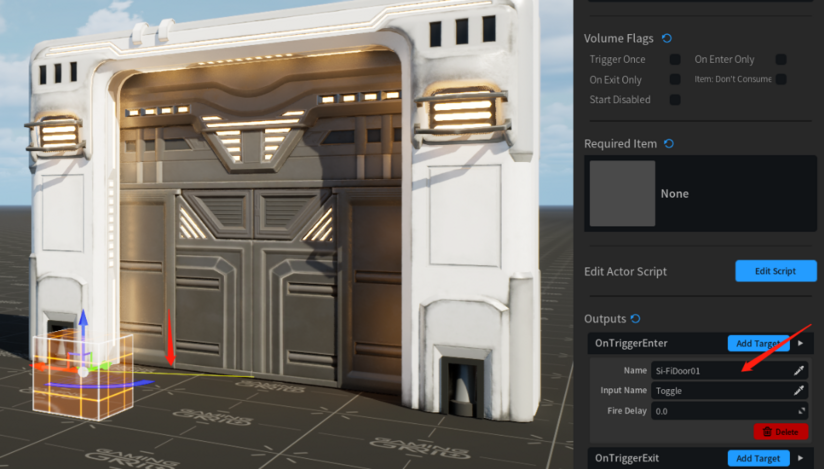
- Edit the Outputs of an Area Trigger. OnTriggerEnter first.
-
- Name: choose the Target Name of the door. You can see a yellow line contact the Area Trigger and the Door.
- Error creating thumbnail: Unable to save thumbnail to destination
- Edit the Input Name, choose "Open". It means when a character Enter the Area Trigger, the door's Input is Open.
-
- Error creating thumbnail: Unable to save thumbnail to destination
- Do the same operation in the "OnTriggerExit". Let the door be Closed when a character Exit the Area Trigger.
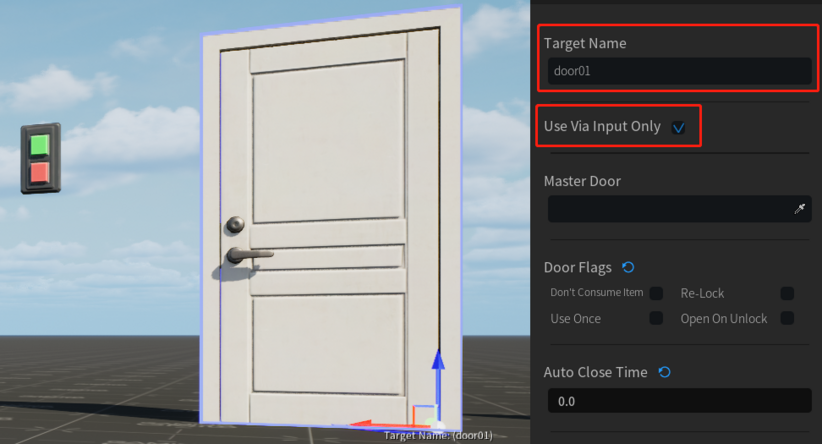
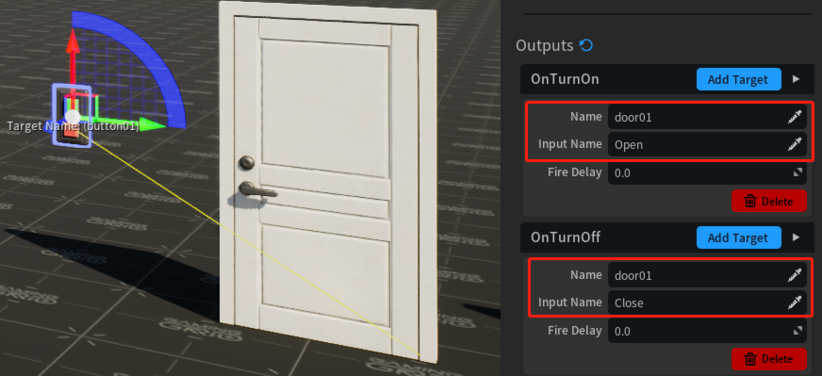
- Button & Card Reader
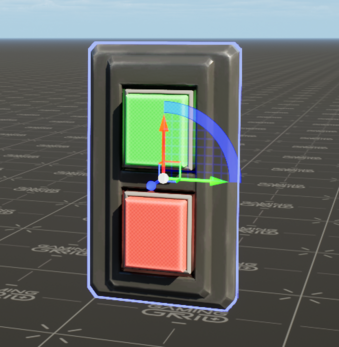
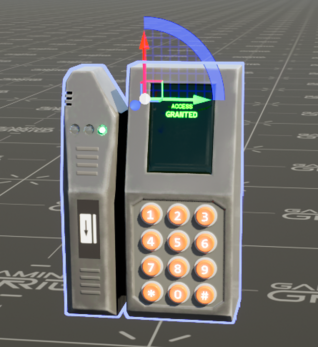
- They can be used to fire output to other objects to make them switch on/off or lock.
- Target Name:
- Target Name for I/O scripting to fire inputs.
-
- Use Via Input Only:
- Disable player interaction with their Use Key Bind.
-
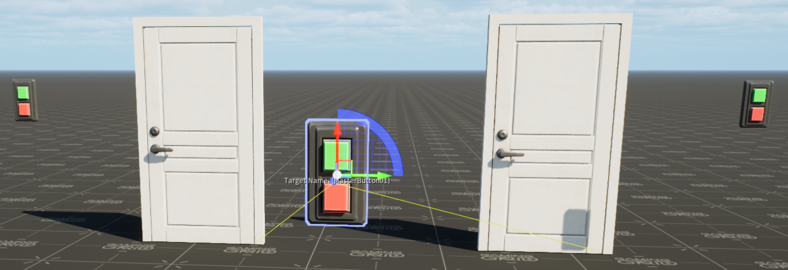
- Master Button:
- It helps you control multiple buttons at the same time and keep the current state of those buttons the same.
- e.g. To make a button to open/close multiple doors.
-
- Button Flags:
- Toggle:
- Fire On State:
- Start On: Flip On/Off State.
- Don't Take Item: If an Item is required, don't consume the item.
- Re-Lock: Re-Lock the button after returning to the off state.
- Use Once: Use once, and deny usage forever.
- Always Locked: [Cosmetic] Button is always locked. Can be used to play Locked State when any player tries to activate it.
-
- Auto Reset:
- Time before button automatically resets. -1= Never auto reset.
-
- Error creating thumbnail: Unable to save thumbnail to destination
- Lock Setting:
- Lock the button to a specific locking type.
-
- Unlock Item:
- Reset to default value.
-
- Sequence Time - Off: Off Sequence time in seconds; Will fire output after this time.
- Sequence Time - On: On Sequence time in seconds; Will fire output after this time.
- Sequence Time - Lock: Lock Sequence time in seconds; Will fire output after this time.
- Sequence Time - Unlock: Unlock Sequence time in seconds; Will fire output after this time.
-
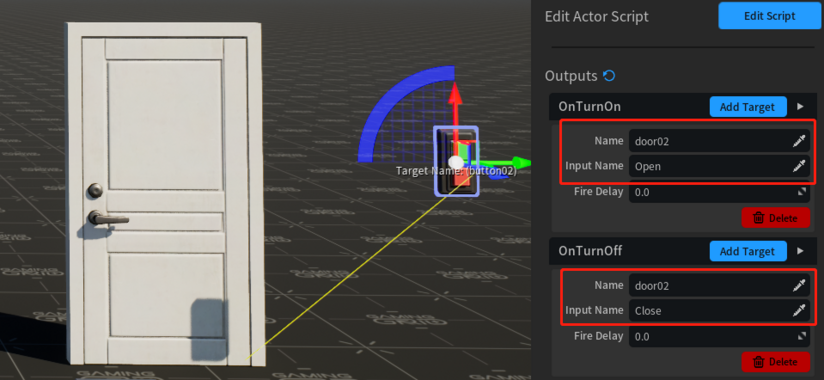
- Outputs:
- OnTurnOn: Fired when button is turned on.
- OnTurnOff: Fired when button is turned off.
- OnLocked: Fired when button is locked/re-locked.
- OnUnlocked: Fired when button is unlocked.
-
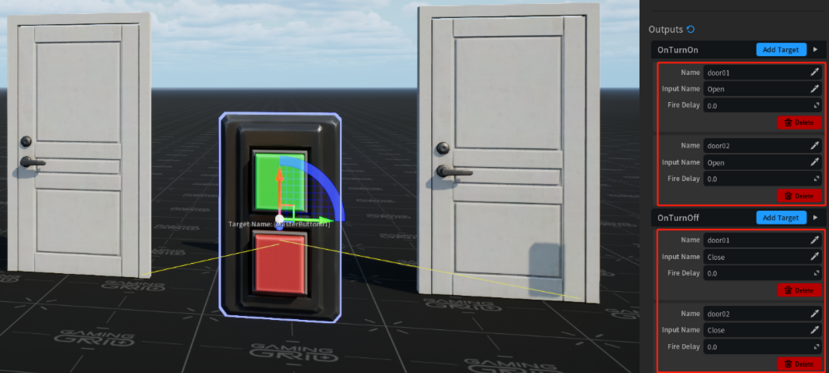
- Place 3rd button and make it can control both door01 and door02.
- Name this button as "MasterButton01"
- Error creating thumbnail: Unable to save thumbnail to destination
-
- Back to the 1st and 2nd button, edit the Master Button.
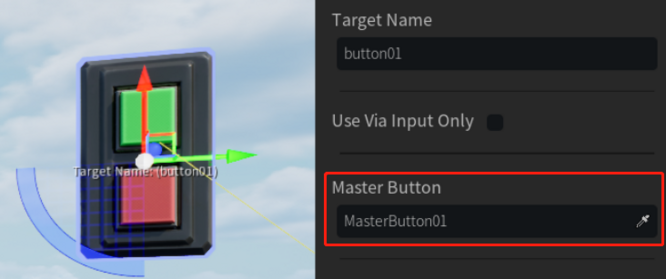
- Error creating thumbnail: Unable to save thumbnail to destination
Jump Pad[edit | edit source]
Error creating thumbnail: Unable to save thumbnail to destination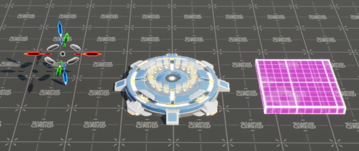
- Info Target: Can be used as the target position of the Jump Pad.
- Edit the Target Name:
- Error creating thumbnail: Unable to save thumbnail to destination
- Target Name for I/O scripting fire inputs.
- Jump Pad 1: A default Jump Pad asset, player can use any other asset to change it, a chair/desk for example.
- Jump Pad Volume: A trigger to make characters Jump into the air.
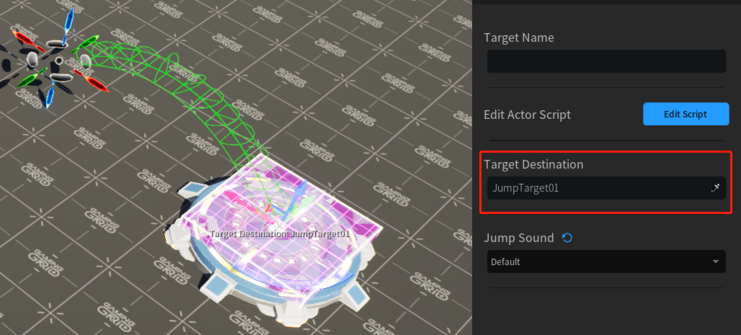
- Target Destination: Name of an Info Target to use. Velocity will be calculated automatically to reach it. Will calculate for an ARC.
- Error creating thumbnail: Unable to save thumbnail to destination
- Jump Velocity: If not using a target, use this speed in the upward direction.
- Error creating thumbnail: Unable to save thumbnail to destination
- Jump Sound: Sound to play when launching objects(Silent/Default/Sci-Fi)
Ladder[edit | edit source]
- Ladder Type: Ladder Material Type(wood/metal).
- Error creating thumbnail: Unable to save thumbnail to destination
- Player can also use some Functional Asset of Ladders.
- Error creating thumbnail: Unable to save thumbnail to destination
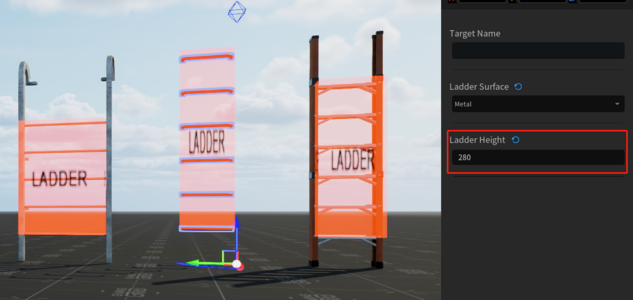
- Ladder Height: Edit the Height to match the scenes.
Teleport[edit | edit source]
 Error creating thumbnail: Unable to save thumbnail to destination
Error creating thumbnail: Unable to save thumbnail to destination
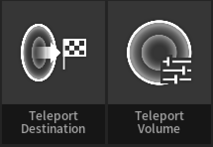
- Teleport Destination: Final position of object finish Teleport.
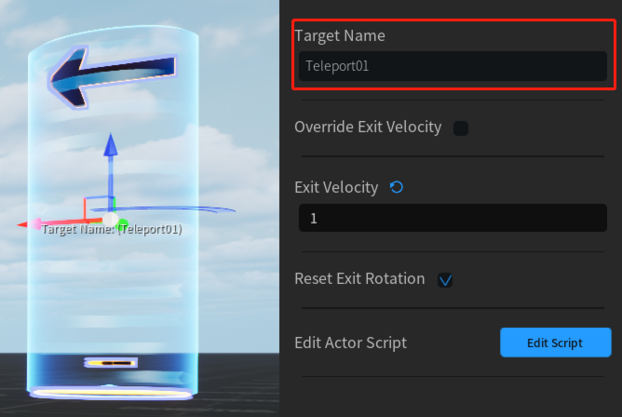
- Target Name: Target Name for I/O scripting to fire inputs.
- Override Exit Velocity: Enable the Exit Velocity.
- Exit Velocity: Exit Speed; When object is teleported, additional velocity will be added towards the direction of the exit point.
- Reset Exit Rotation: When object is teleported, make the object face the direction of the exit point. If false, they will have their original world rotation
- PS: The Destination can't below the "ground", it will make players dead after finish teleport.
- Teleport Volume: A trigger to Teleport an object to another position.
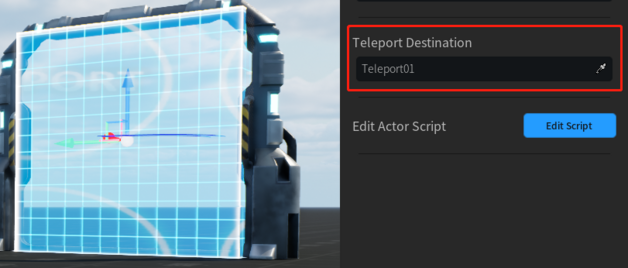
- Teleport Destination: Name of the teleport destination.
- Teleporter1: A default Teleporter asset, player can use any other asset to change it.
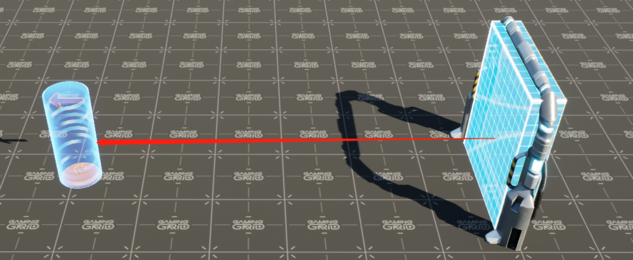
- Player can use these objects to make a teleport.
- PS:
- Multiple Teleport Destinations can be set with the same target name. After transmission, one of these Teleport Destinations will be randomly selected as the destination when a Teleport Volume uses this target name as the destination.
- A Teleport Destination can be set as the destination by multiple Teleport Volumes, and these Teleport Volumes can be transmitted to the same destination.
Demo Videos[edit | edit source]
- Interaction Area Trigger
- Interaction Button
- Interaction Jump Pad
- Interaction Ladder
- Interaction Teleport
Logic[edit | edit source]
Logic object is a series of functional capabilities. They receive input from other objects, process it, and output it to other objects.
Branch[edit | edit source]
- Tests a boolean value and fires an output based on whether the value is true (one) or false (zero). Use this entity to branch between two potential sets of events.
- Target Name:
- The target name that other entities refer to this entity by.
- Key values:
- Initial value: Initial value of the branch. If you were to call "Test" input now, it would fire either OnTrue or OnFalse depending on this value.
- Inputs:
- SetValue: Set the boolean value without performing the comparison. Use this to hold a value for a future test.
- SetValueTest: Set the boolean value and test it, firing OnTrue or OnFalse based on the new value.
- Toggle: Toggle the boolean value between true and false.
- ToggleTest: Toggle the boolean value and tests it, firing OnTrue or OnFalse based on the new value.
- Test: Test the input value and fire OnTrue or OnFalse based on the value.
- Outputs:
- OnTrue: This Output fires when the stored boolean value is true (1) and the Test input is fired or when the stored boolean value is set to true (1) by either the SetValueTest or ToggleTest inputs with parameter value 1.
- OnFalse: This Output fires when the stored boolean value is false (0) and the Test input is fired or when the stored boolean value is set to false (0) by either the SetValueTest or ToggleTest inputs with parameter value 0.
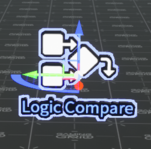
Compare[edit | edit source]
- It examines the relationship between two numbers ("value" and "compare value"), and fires appropriate output(s).
- Target Name:
- The target name that other entities refer to this entity by.
- Start Disabled:
- Start in Disabled State.
- Compare Value:
- The value to compare against.
- Initial Value:
- Initial value for the input value.
- Inputs:
- SetValue: Set the value that will be compared against the compare value.
- SetValueCompare: Set the value that will be compared against the compare value and performs the comparison.
- SetCompareValue: Set the compare value.
- Compare: Force a compare of the input value with the compare value.
- Outputs:
- OnLessThan: Fired when the input value is less than the compare value. Sends the input value as data.
- OnEqualTo: Fired when the input value is equal to the compare value. Sends the input value as data.
- OnNotEqualTo: Fired when the input value is different from the compare value. Sends the input value as data.
- OnGreaterThan: Fired when the input value is greater than the compare value. Sends the input value as data.
Math Counter[edit | edit source]
- It stores and manipulates a numerical value. It can trigger on reaching user-defined maximum or minimum values, or output its value every time it changes. It also has the ability to perform simple mathematical functions. When the math_counter is disabled, it will become read-only until re-enabled.
- Error creating thumbnail: Unable to save thumbnail to destination
- Target Name:
- The target name that other entities refer to this entity by.
- Start Disabled:
- Start in Disabled State.
- Key Values:
- Starting Value: Set the initial value at run-time using the entity's SetValue input. For example, from a logic_relay using its OnSpawn output.
- Minimum Value: Minimum legal value for the counter. If min=0 and max=0, no clamping is performed.
- Maximum Value: Maximum legal value for the counter. If min=0 and max=0, no clamping is performed.
- Clamp Min: Enable Clamping to the Minimum Value.
- Clamp Max: Enable Clamping to the Maximum Value.
- Inputs: Add: Add an amount to the counter and fire the OutValue output with the result. Divide: Divide the counter by an amount and fire the OutValue output with the result. Note: If this causes a division by zero, the counter will ignore the input. Multiply: Multiply the counter by an amount and fire the OutValue output with the result. SetValue: Set the counter to a new value and fire the OutValue output with the result. SetValueNoFire: Set the counter to a new value without firing any outputs. Subtract: Subtract an amount from the counter and fire the OutValue output with the result. SetHitMax: Set the upper bound of the counter and fire the OutValue output with the current value. SetHitMin: Set the lower bound of the counter and fire the OutValue output with the current value. GetValue: Causes the counter to fire its OnGetValue output with the current value of the counter. Used for polling the counter when you don't want constant updates from the OutValue output. SetMaxValueNoFire: Set the counter to the MaxValue without firing any outputs. SetMinValueNoFire: Set the counter to the MinValue without firing any outputs.
- Outputs:
- OnChange: Fired when the counter value changes.If the Target Input's parameters is left empty, the math_counter's value is used.
- OnHitMin: Fired when the counter value meets or goes below the min value. The counter must go back above the min value before the output will fire again.
- OnHitMax: Fired when the counter value meets or exceeds the max value. The counter must go below the max value before the output will fire again.
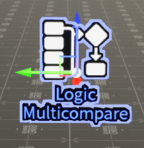
Multi Compare[edit | edit source]
- Compares a set of inputs to each other. If they are all the same, fires an OnEqual output. If any are different, fires the OnNotEqual output.
- This entity has an internal list of integers that it has received from any inputValue input's. Any values sent to this entity, must be sent as an integer or boolean because "if it can't be converted" the entity will "just throw it away" (Source Code comment from dev's). Currently, there is no way to clear this 'list', so the entity is not reusable.
- Target Name:
- The target name that other entities refer to this entity by.
- Key Values:
- Integer Value (optional): Initial integer value.
- Should use Integer Value: If set, compare inputs against Integer Value.
- Inputs InputValue: Input value CompareValues: Compares the values and fires appropriate outputs
- Outputs:
- OnEqual: Fires if the values are equal (!activator is the activator)
- OnNotEqual: Fires if the values are not equal (!activator is the activator)
Random Outputs[edit | edit source]
- It randomly fires one of up to eight separate outputs. Use logic_case in older engine branches or if you need twice as many outputs.
- Error creating thumbnail: Unable to save thumbnail to destination
- Target Name:
- The target name that other entities refer to this entity by.
- Start Disabled:
- Start in Disabled State. Stay dormant until activated (with theEnableinput).
- Flags:
- Remove On Fire: destroy self; fire outputs only once until level reset.
- Allow Fast Re-trigger: If false, ignore InputTrigger until the highest FireDelay value time.
- Key Values:
- OnTrigger1 Chance to OnTrigger8 Chance: Chance (from 0 to 1) of the OnTrigger1-8 output firing when this entity is triggered.
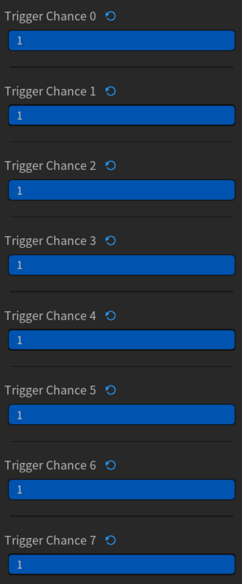
- Inputs: Trigger: Trigger this entity, causing its OnTrigger outputs to fire if it is enabled. Toggle: Toggle this entity between enabled and disabled. CancelPending: Cancel any events fired by this entity that are currently pending in the I/O event queue.
- Outputs:
- OnTrigger1 to OnTrigger8: This output has a chance to fire when the entity is triggered.
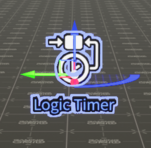
Timer[edit | edit source]
- It fires an output at regular or random intervals. It can optionally alternate between a "high" and a "low" output.
- Target Name:
- The target name that other entities refer to this entity by.
- Start Disabled:
- Stay dormant until activated (with theEnableinput).
- Key Values:
- Use Random Time: Makes the entity fire at random intervals. Range of values is restricted by the next two KVs.
- Minimum Random Interval: If "Use Random Time" is set, this is the minimum time between timer fires. The time will be a random number between this and the "Maximum Random Interval".
- Maximum Random Interval: If "Use Random Time" is set, this is the maximum time between timer fires. The time will be a random number between the "Minimum Random Interval" and this.
- Fire Interval: If "Use Random Time" isn't set, this is the time between timer fires, in seconds. Make sure output delay times are less than this value.
- Flags:
- Oscillator: alternates between OnTimerHigh and OnTimerLow outputs.
- Fire Once: Fire Once When timer is reached, you must call ResetTimer to start over.
- Inputs:
- RefireTime: Set a new Refire Interval. ResetTimer: Reset the timer. It will fire after the Refire Interval expires. FireTimer: Force the timer to fire immediately. Enable:Enable the timer. Disable: Disable the timer. Toggle: Toggle the timer on/off. LowerRandomBound: Set a new Minimum Random Interval. UpperRandomBound: Set a new Maximum Random Interval. AddToTimer: Add time to the timer if it is currently enabled. Does not change the Refire Interval. SubtractFromTimer: Subtract time from the timer if it is currently enabled. Does not change the Refire Interval.
- Outputs:
- OnTimer: Fired when the timer expires.
- OnTimerHigh: Fired every other time for an oscillating timer.
- OnTimerLow: Fired every other time for an oscillating timer.
Demo Videos[edit | edit source]
Lights[edit | edit source]
Error creating thumbnail: Unable to save thumbnail to destination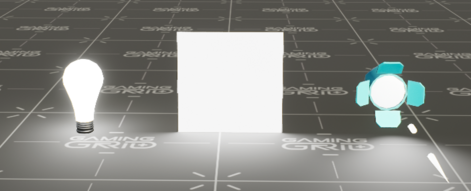
Point Light[edit | edit source]
- Error creating thumbnail: Unable to save thumbnail to destination
- Start On: If there is no Target Name and this light is OFF, it will not be saved.
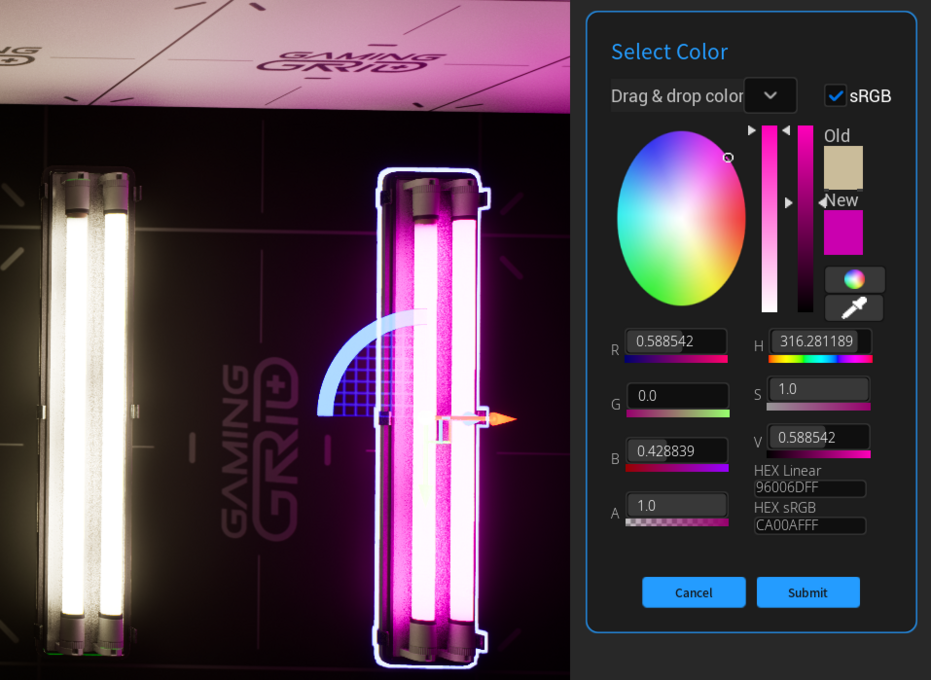
- Light Color: Select Color of Lights.
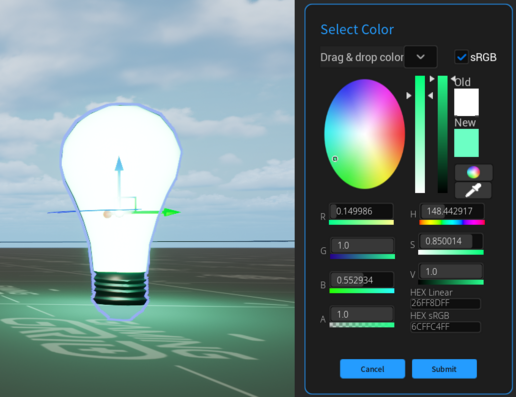
- Light Intensity: Edit the light intensity.
- Source Radius: Light Source Radius.
- Source Length: Light Source Length.
- Cast Shadows: Lights that cast shadows are the most expensive. Too many overlapping shadow-casting lights will harm performance.
- Attenuation Radius: Light Attenuation Radius; Light will fade intensity over this distance.
- Fade In/Out Time: Time it takes for light to Fade In or Out when InputTurnOn/InputTurnOff is fired.
- Light Style Preset: Select a Style Preset. If a preset is used, the framerate is always 10FPS.
- Custom Light Style: Custom Style string. It is ignored if preset is selected above.
- Light Style FPS: Default to 10, Max of 40. Determines the rate at which the style is updated.
Rect Light[edit | edit source]
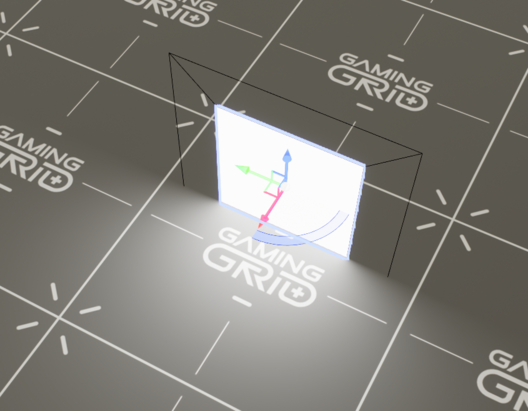
- Start On: If there is no Target Name and this light is OFF, it will not be saved.
- Light Color: Select Color of Lights.
- Light Intensity: Edit the light intensity.
- Barn Door Angle & Barn Door Length
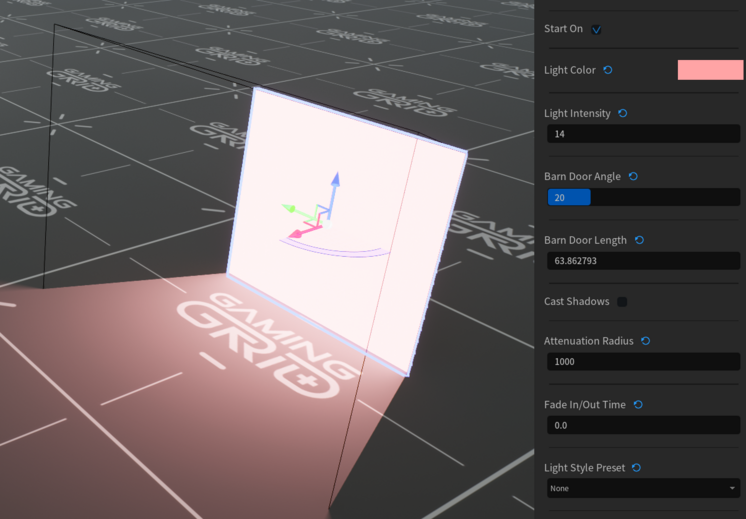
- Cast Shadows: Lights that cast shadows are the most expensive. Too many overlapping shadow-casting lights will harm performance.
- Attenuation Radius: Light Attenuation Radius; Light will fade intensity over this distance.
- Fade In/Out Time: Time it takes for light to Fade In or Out when InputTurnOn/InputTurnOff is fired.
- Light Style Preset: Select a Style Preset. If a preset is used, the framerate is always 10FPS.
- Custom Light Style: Custom Style string. It is ignored if preset is selected above.
- Light Style FPS: Default to 10, Max of 40. Determines the rate at which the style is updated.
Spot Light[edit | edit source]
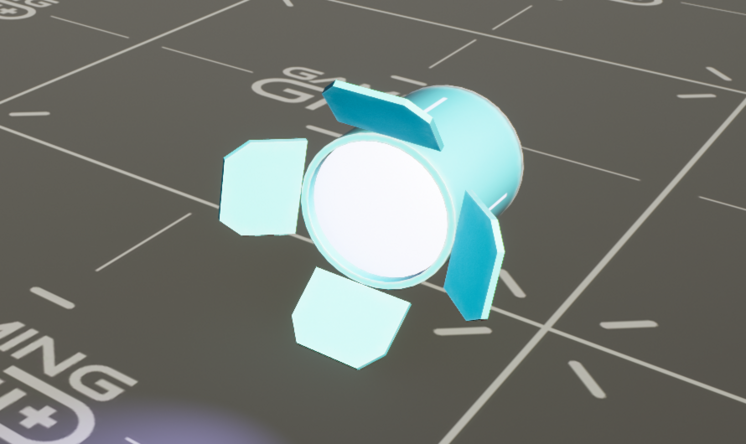
- Start On: If there is no Target Name and this light is OFF, it will not be saved.
- Light Color: Select Color of Lights.
- Light Intensity: Edit the light intensity.
- Source Radius: Light Source Radius.
- Source Length: Light Source Length.
- Cast Shadows: Lights that cast shadows are the most expensive. Too many overlapping shadow-casting lights will harm performance.
- Attenuation Radius: Light Attenuation Radius; Light will fade intensity over this distance.
- Inner Cone Angle & Outer Cone Angle
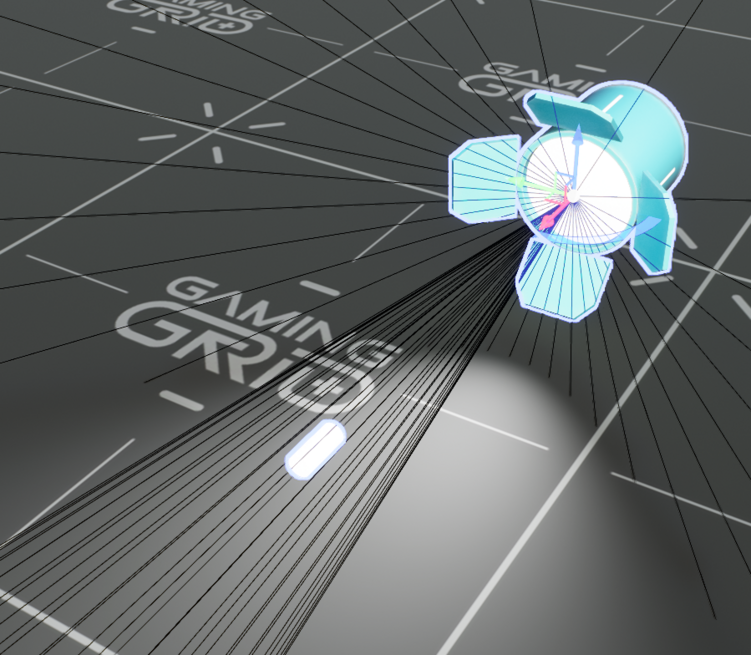
- Fade In/Out Time: Time it takes for light to Fade In or Out when InputTurnOn/InputTurnOff is fired.
- Light Style Preset: Select a Style Preset. If a preset is used, the framerate is always 10FPS.
- Custom Light Style: Custom Style string. It is ignored if preset is selected above.
- Light Style FPS: Default to 10, Max of 40. Determines the rate at which the style is updated.
Demo Videos[edit | edit source]
Assets[edit | edit source]
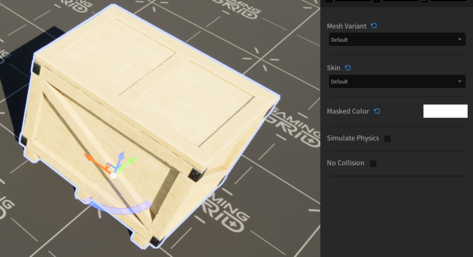
Mesh Variant[edit | edit source]
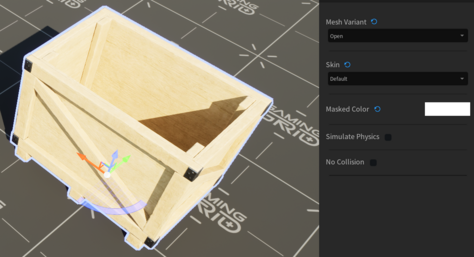
- Static Prop Mesh Variant, some asset's mesh can be edited.
Skin[edit | edit source]
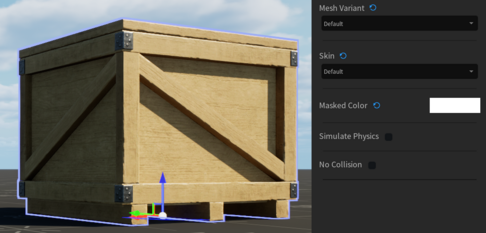
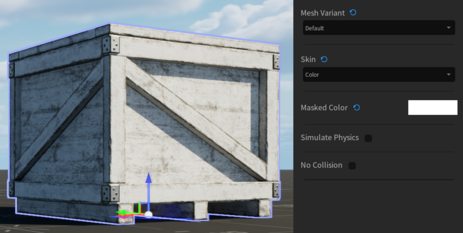
- Static Prop Skin, some asset's skin can be edited.
Masked Color[edit | edit source]
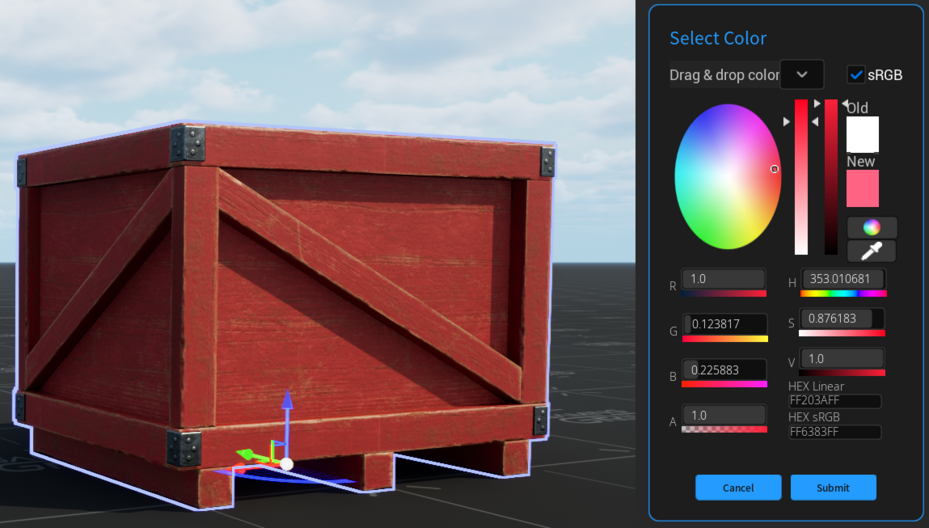
- Change color of masked part of mesh.
Emission Color[edit | edit source]
- Custom emission color.
Emission Scale[edit | edit source]
- Custom emission scale.
Spline[edit | edit source]
- Assets that can repeat infinite distances with one Static Mesh and can bend with multiple endpoints.
- Error creating thumbnail: Unable to save thumbnail to destination
- When you select the spline asset, you can see and left-click the endpoint.
- Error creating thumbnail: Unable to save thumbnail to destination
- The endpoint can move in 3 directions like other objects.
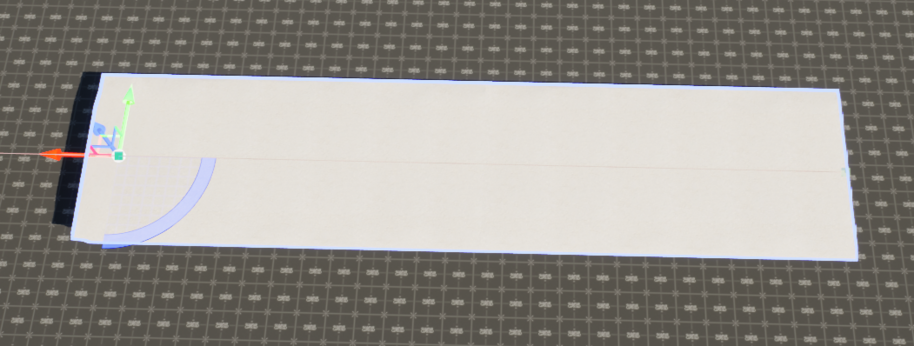
- The mesh can be lengthened or shortened along the X axis.
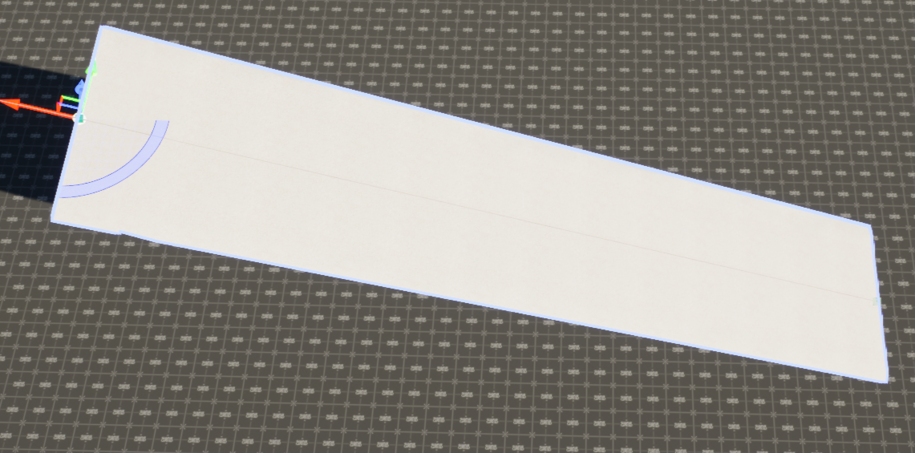
- The height of the endpoint can be adjusted along the Z axis to make a slope.
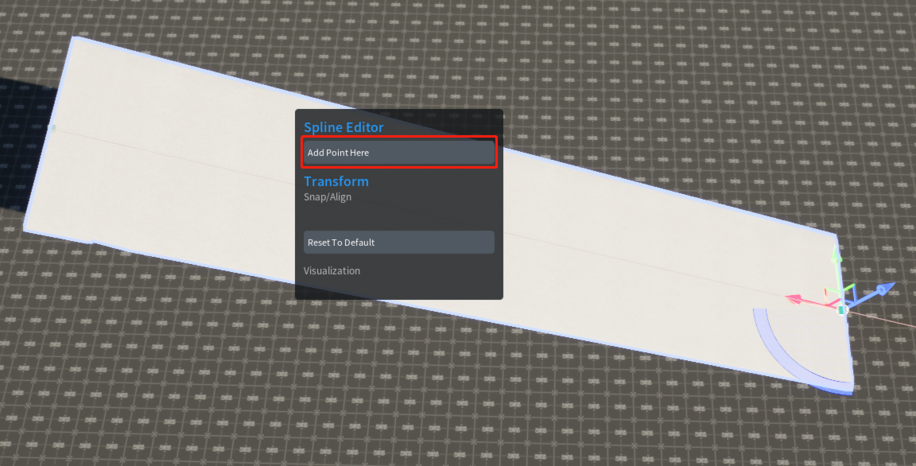
- You can add points by right-clicking on the spline.
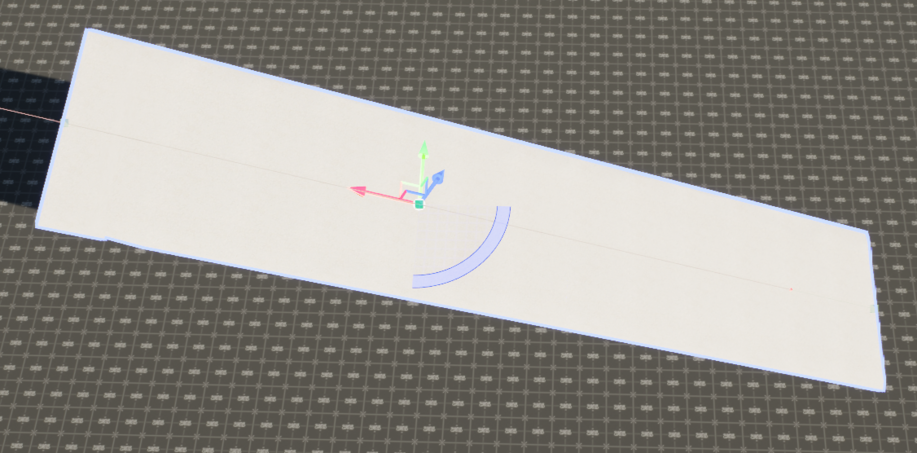
- The new point can also be edited in three directions.
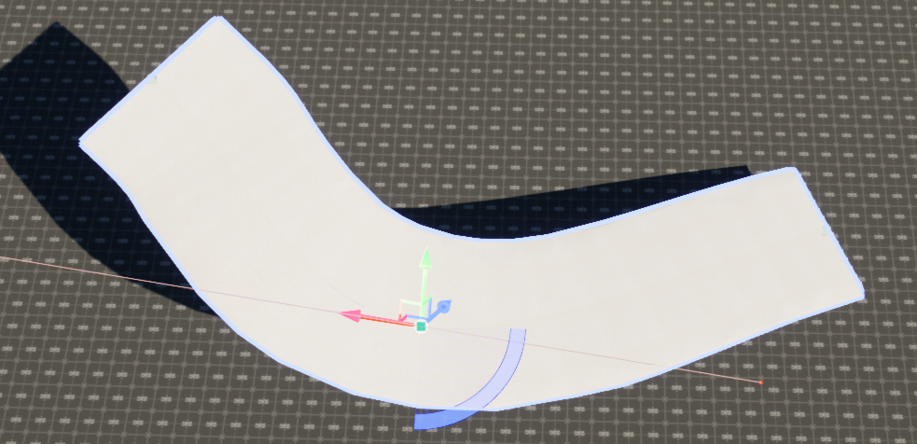
- More points on the spline can help you edit more complex shapes.
Misc[edit | edit source]
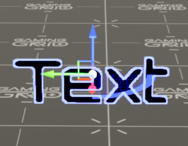
- Text Render
- Floating Text: Text to Display.
- Text Color: Color of the Floating Text.
- Text World Size: World Scale of the Text.
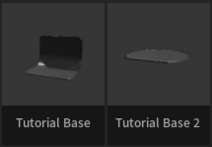
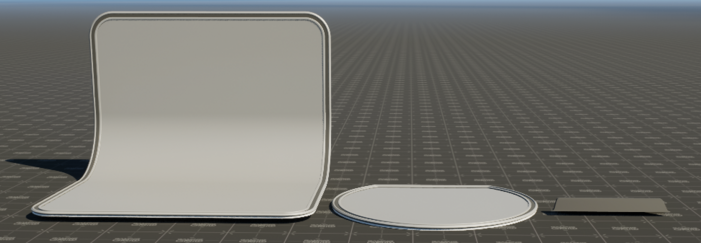
- Tutorial
- These assets are used to help you make the Tutorial Base.
Others[edit | edit source]
- Simulate Physics: Enable Physics Simulation on this Static Mesh.
- No collision: No Collision (Not-solid) by default.
